Adding Your BadgeCert Digital Badge to Outlook
This content is also available as a PDF.
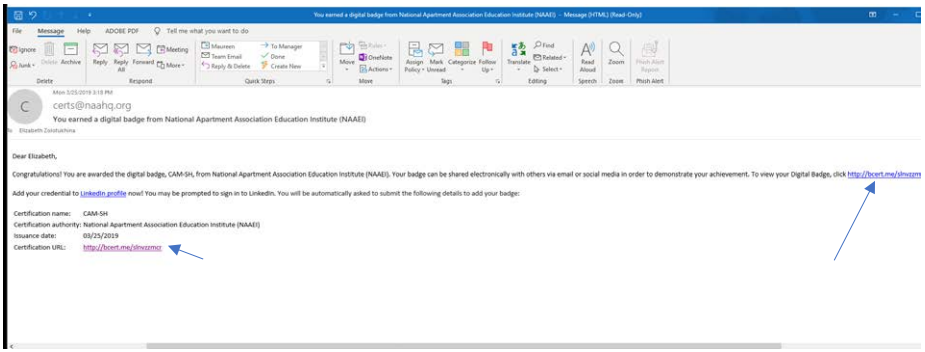
- Click on either of the links provided in the BadgeCert digital badge claim email to view your digital badge. (Indicated by thin blue arrows below.)
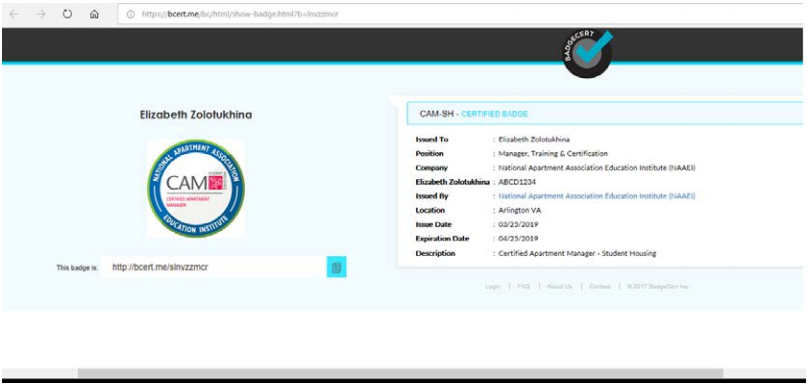
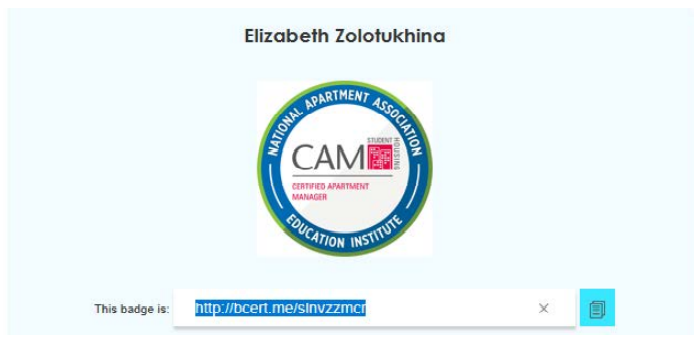
- Your digital badge image and its corresponding URL will open on the BadgeCert website.
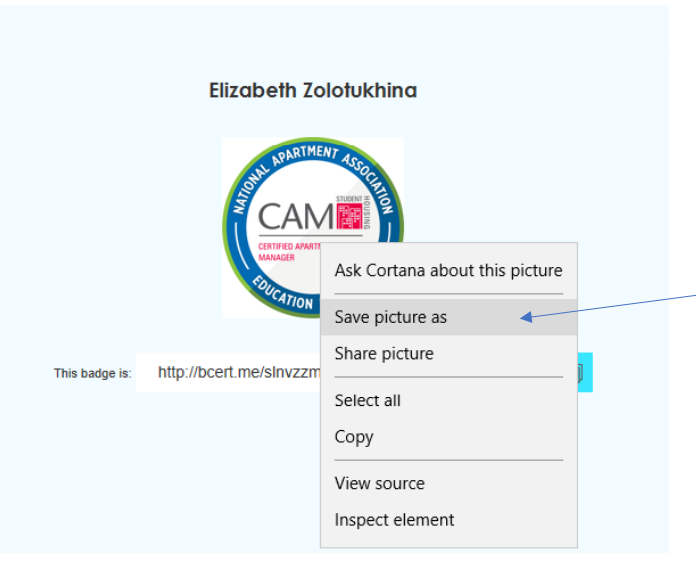
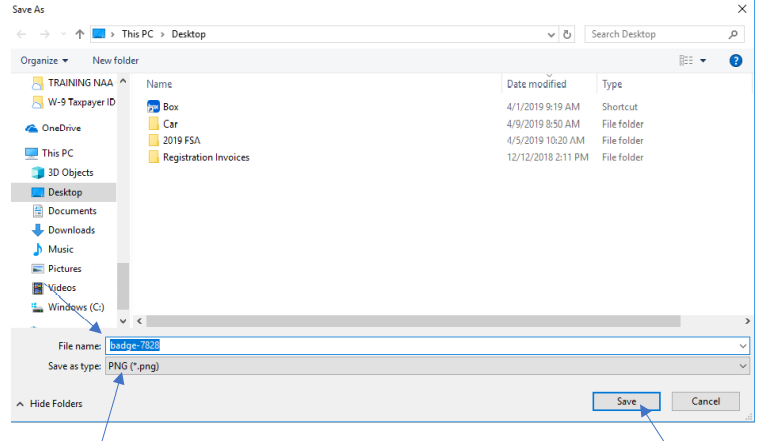
- Right click on the digital badge image and choose “save picture as” from the drop down menu.
- Name the file (or keep the default name), and click “Save” to save it as a *.png file to your Desktop.
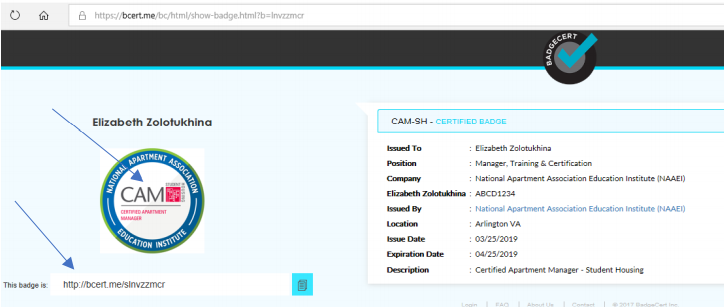
- Copy the badge URL (highlighted in the image below) to a blank Notepad or Word file. Save that file to your Desktop. You will need that URL later in this process.
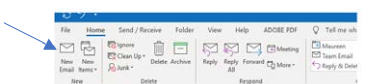
- Click on “New Email” to open a new email message.
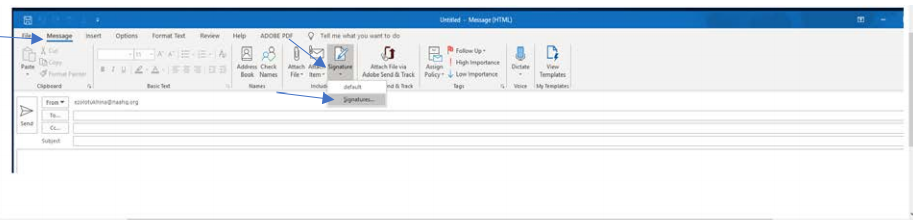
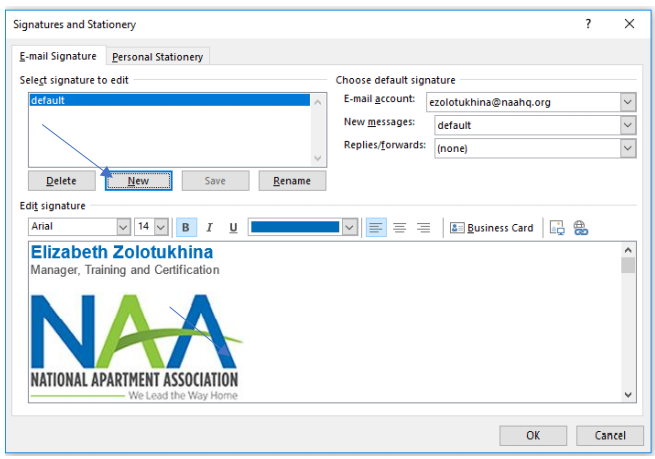
- From the Message menu, select Signature -> Signatures.
- Click on “New”.
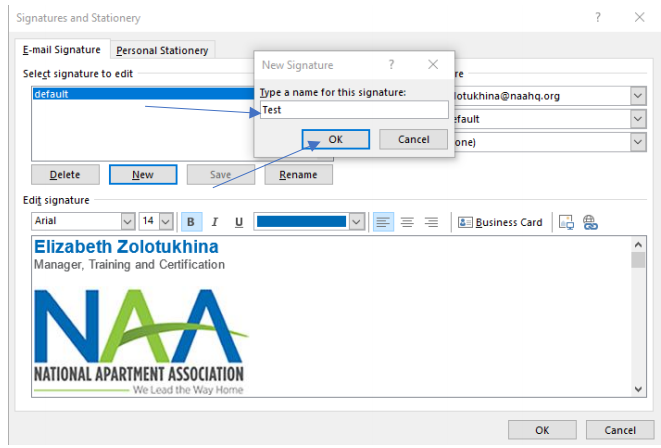
- In the New Signature text box, type a name for your signature, and click “OK”.
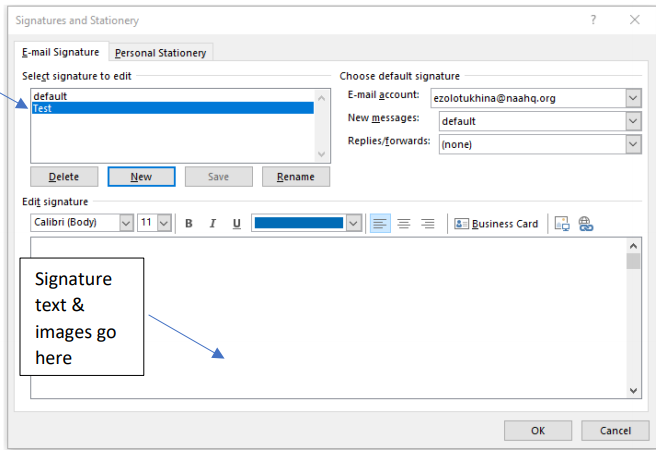
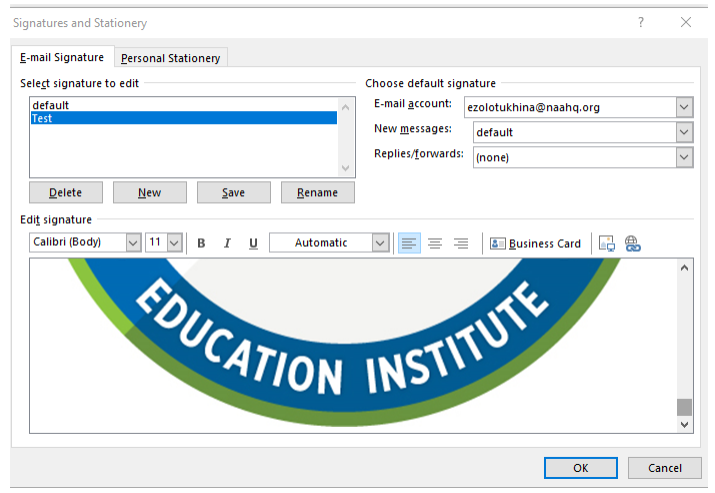
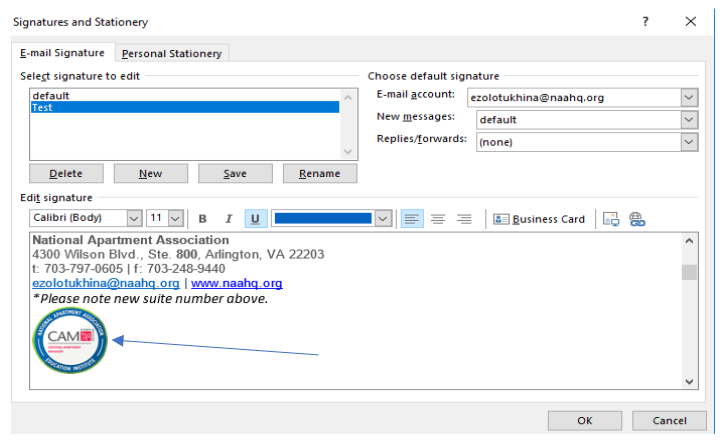
- The signature you just created will be highlighted in the “Select signature to edit” window. This will enable you to type the text and image/s associated with your signature in the “Edit signature” text box.
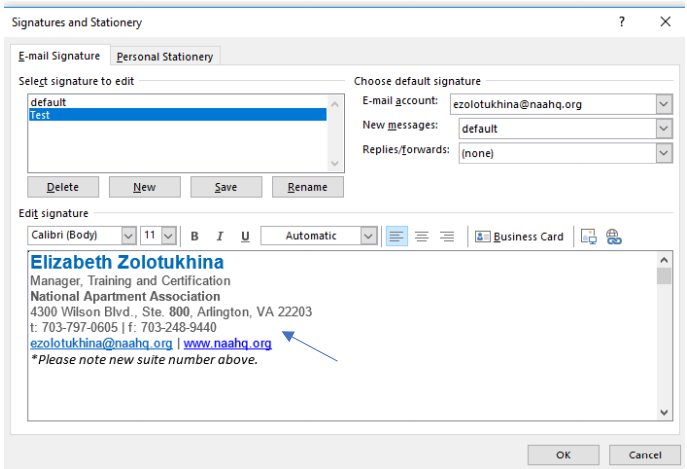
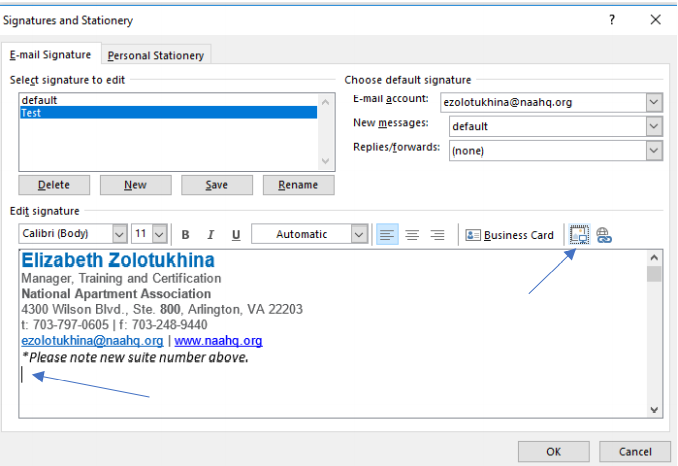
- Copy and paste any text that you would like to include in your signature into the “Edit signature” text box. Below is an example:
- Place the cursor where you would like to place your digital badge image, and click on the “insert picture” button. Both are indicated by thin blue arrows below.
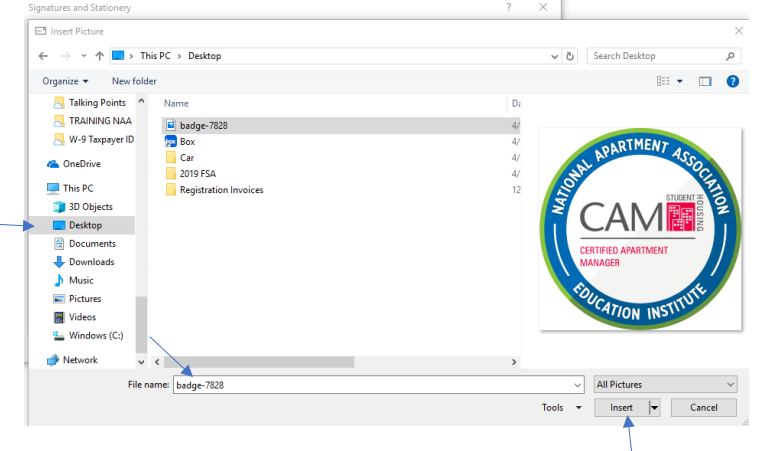
- From the “Insert Picture” pop-up window, navigate to your desktop, or wherever you saved the digital badge image, and select it. It will appear in the “File name” text box. Then, click “Insert.”
- The image of your digital badge now will appear in the “Edit signature” text box. Re-size as desired by dragging the corners of the image.
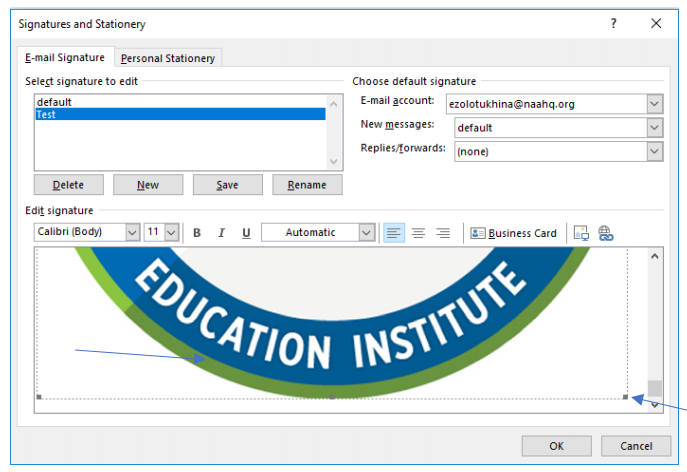
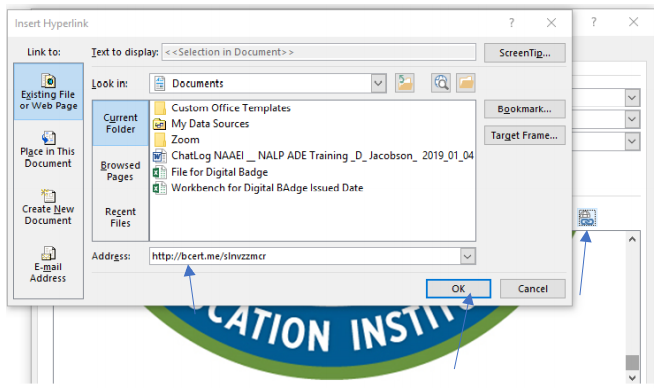
- Select your digital badge image. Shown highlighted in grey below.
- . Click on the “Insert Hyperlink” button. The “Insert Hyperlink” pop-up window will appear. In the “Address” text box below copy and paste the URL to your digital badge that you obtained in Step 5 above. Click “OK”.
- The “Insert hyperlink” pop-up window will disappear.
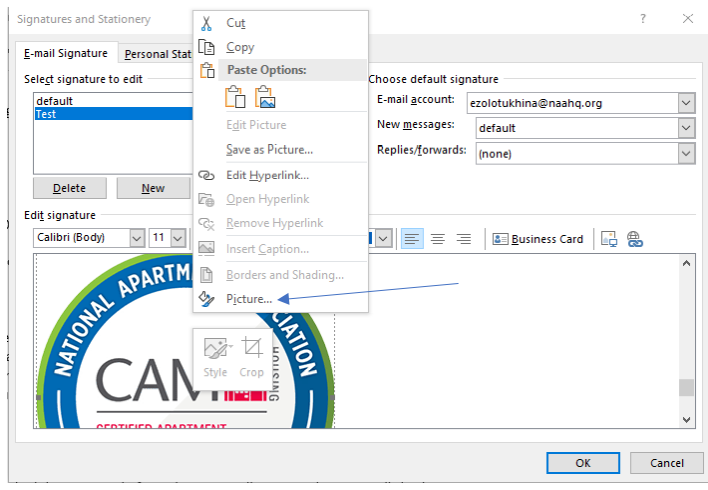
- To re-size (shrink) the digital badge image, right click on the image and click on “picture” from the drop down menu (indicated by blue arrow below).
- Click on the “Size” tab.
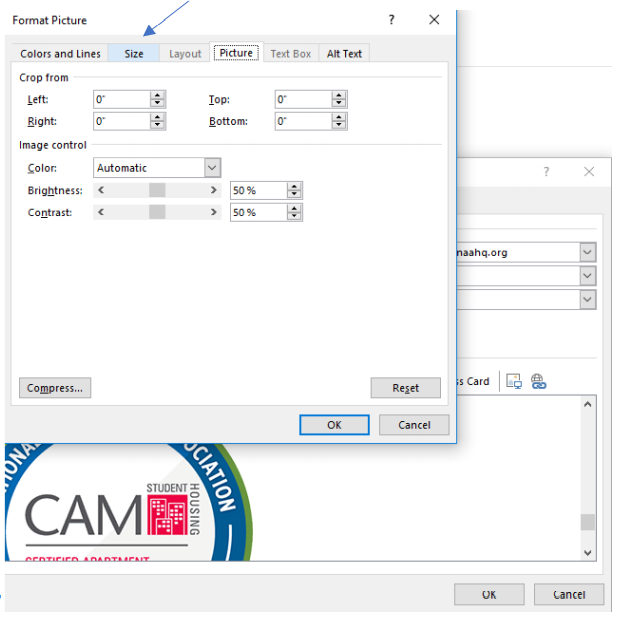
- In the “Scale” section, type 25 in the “Height” and “Width” text boxes. Then, click “Ok”. All indicated below with thin blue arrows.
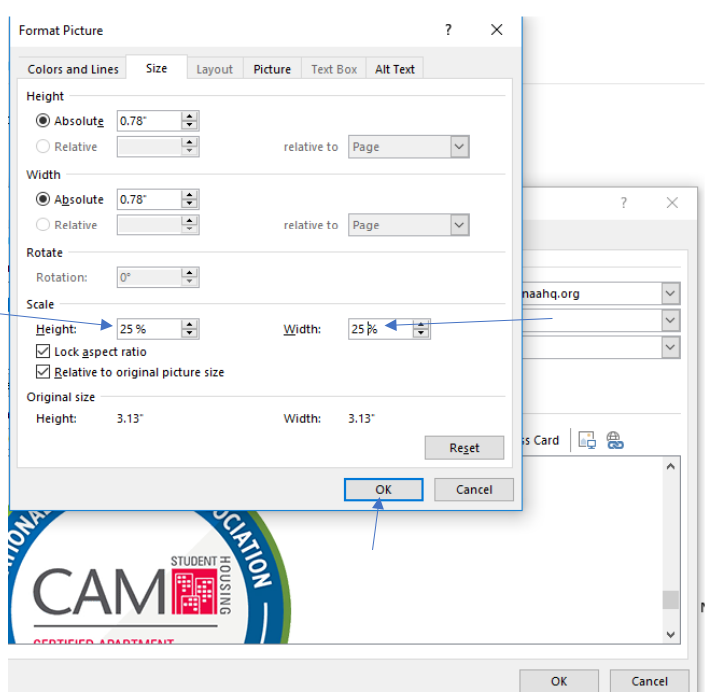
- You’ll see the digital badge image has shrunk.
- The digital badge in your email signature now will have the associated meta-data. Those who click on the digital badge image in your email signature will be able to see the details regarding your digital badge on the BadgeCert website.