Scheduling an NAAEI Exam with Castle Live Online Proctoring (LOP)
This content is also available as a PDF.
Note: During this process, you will receive the following three automatically generated emails. You will not need the information in these emails to schedule your exam, but you will need it to take the exam, so please retain these three emails until after you’ve completed the exam.
- Notice to Schedule Email [insert name] Exam” from [email protected]
- “Castle Worldwide SCHEDULING CONFIRMATION NOTICE (Admission Ticket)” from [email protected], and
- “Castle Worldwide: Your Exam Appointment” from [email protected] “. This email provides your exam appointment ID and the link to begin your exam.
Scheduling Your Exam
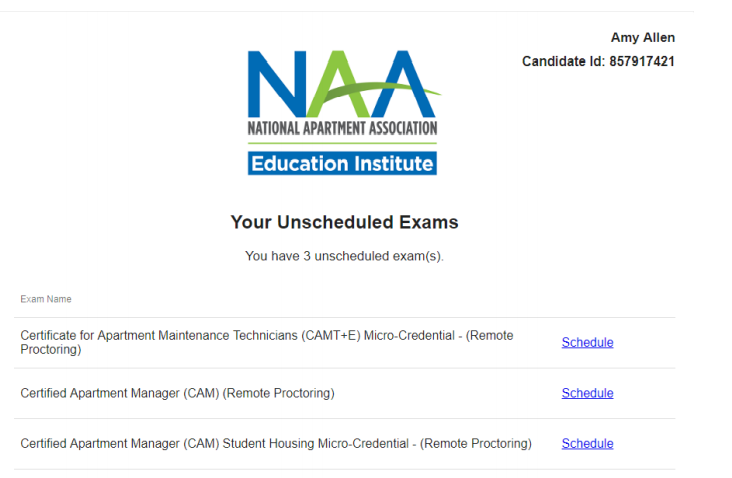
- Candidate receives Castle exam eligibility code from NAAEI or affiliate staff.
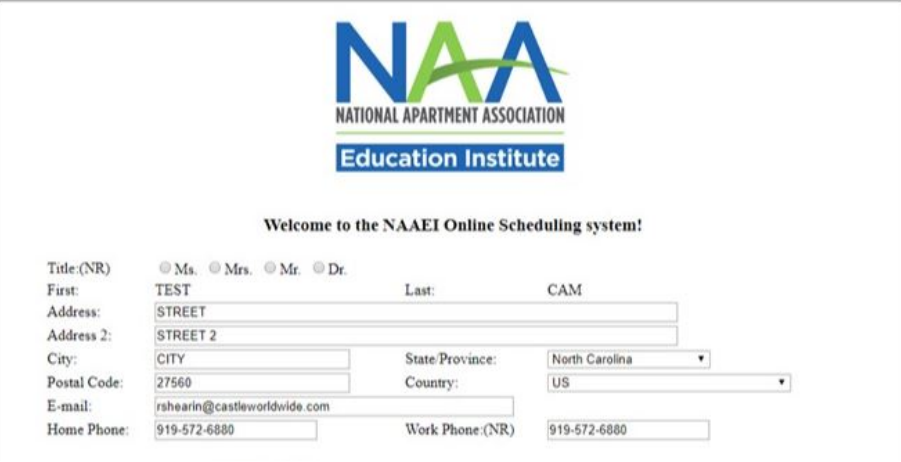
- Please go to the scheduling website to book your exam. Please schedule your exam under your full legal name as it appears on your government-issued ID. When you sign in to take your exam, you will need to present a government-issued photo ID to the proctor for confirmation. You will see the following screen:
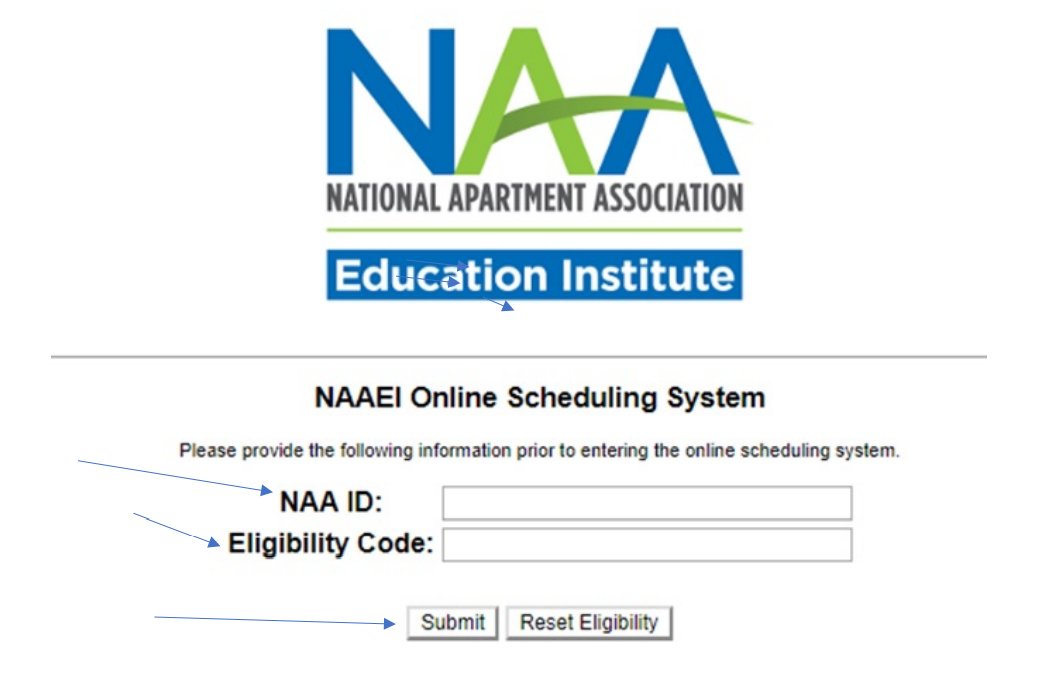
- Input your NAA ID and the exam eligibility code you received into the appropriate fields above. Click “Submit”.
- The next screen (pictured below) will ask you to review/edit/confirm your demographic information. Review your demographic information and make any necessary corrections. It is very important that your email address is correct.
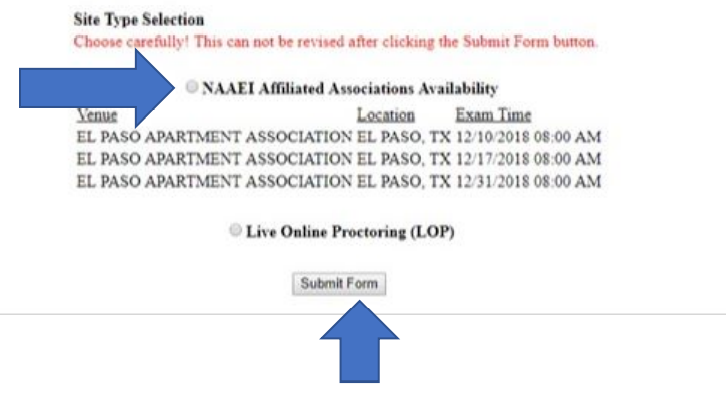
- At the bottom of the page, select the radio button “Live Online Proctoring (LOP)” to test via live online proctoring (LOP). Then, click “Submit Form.”
- Click “OK” on the pop-up message pictured below:

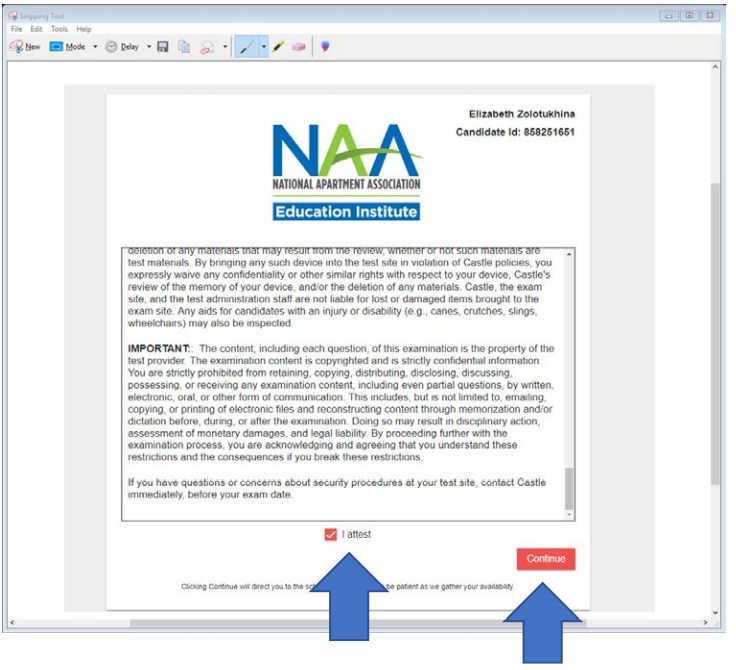
- Carefully review the examination admission requirements. Scroll down to the end of the displayed document, check the checkbox next to “I attest”, then click “Continue”.
- Choose the exam you want to schedule and click “Schedule”
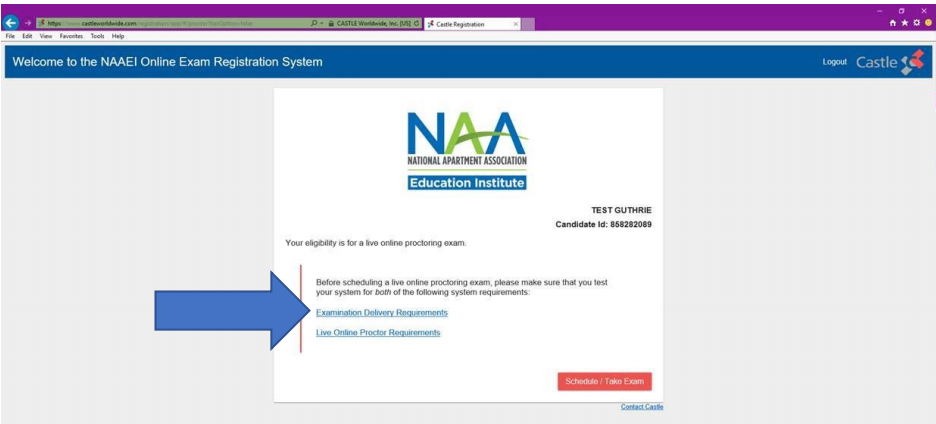
- You will see the screen displayed below. When you click on “Examination Delivery Requirements”, it will initiate the process of verification that the computer you are using is suitable for the testing purposes. However, if you are scheduling your exam on a computer DIFFERENT from the one you will be testing on, you may bypass this process for now, and continue straight to the scheduling part. (Starting at step 17 below.) You will be given another opportunity to verify your computer’s suitability immediately prior to the exam. To avoid any delays in your testing, we strongly recommend that you schedule your test using the same computer which will be used for testing.
- A new tab will open in your browser. Click on “click here to test now."
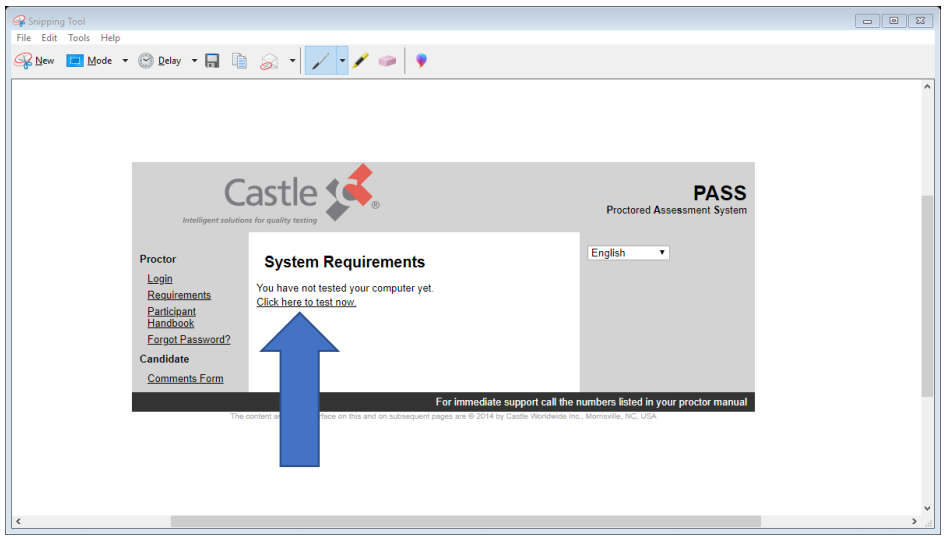
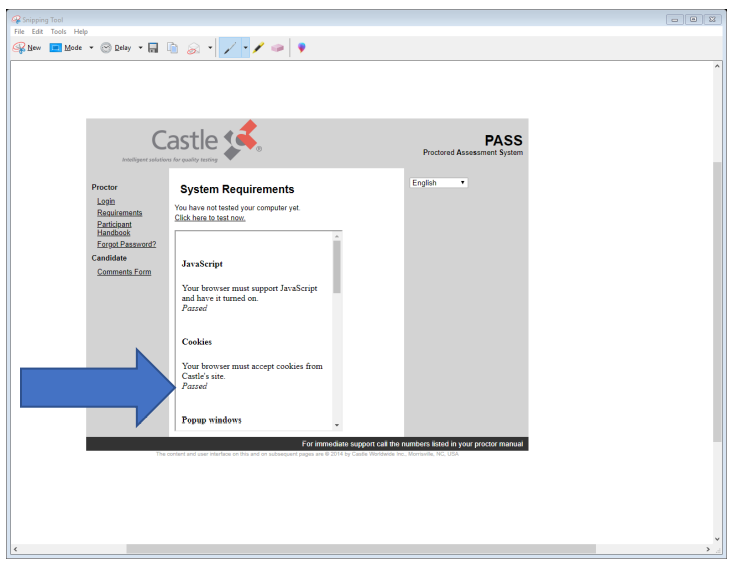
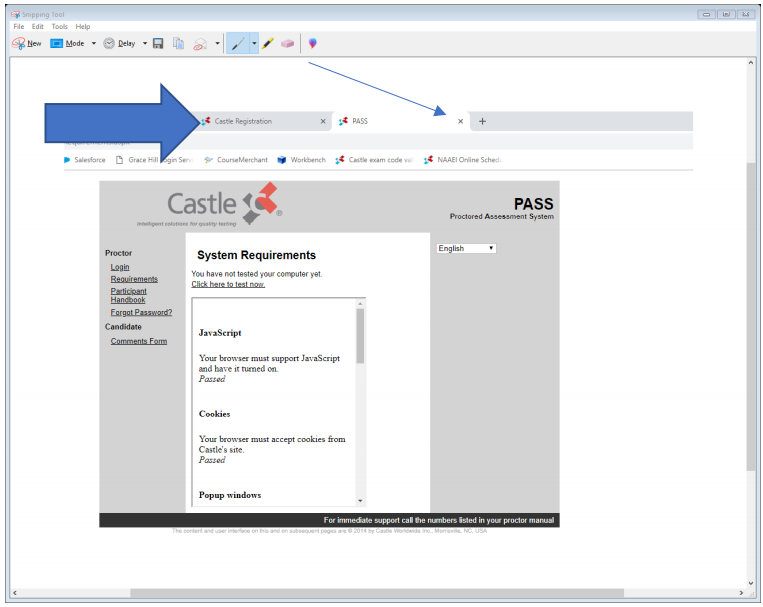
- You will see the following screen. Scroll down to make sure that all components have status “Passed” indicated.
- If all components feature a “Passed” status, close the “PASS” browser tab (thin blue arrow). You will return to the “Castle Registration” tab (thick blue arrow).
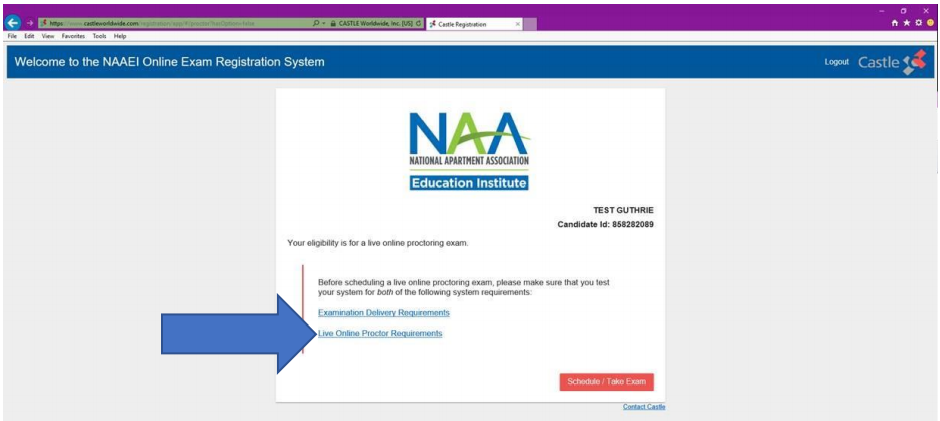
- In the “Castle Registration” tab, now click on “Live Online Proctoring Requirements.”
- A new tab will open, and different components of your computer will be tested.

- Please be patient while the system finishes testing your internet speed (thin blue arrow above). A minimum bandwidth of 2 Mbps upload and download speed is required to support the video process during the exam. When the process is finished, you’ll see the following screen:
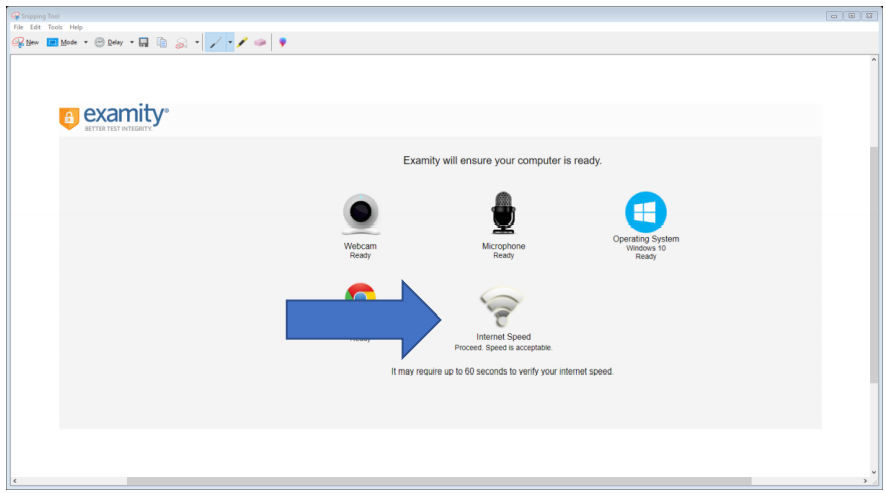
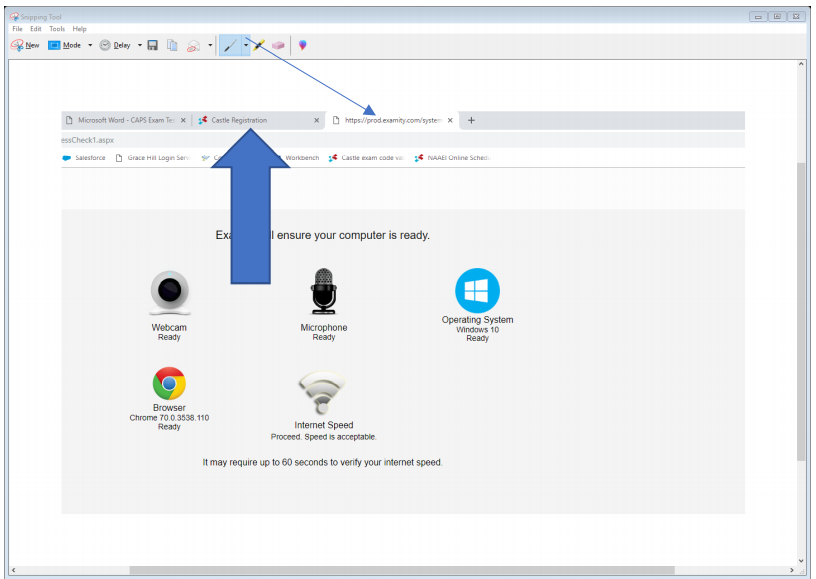
- After you see “Proceed. Speed is acceptable” (Thick blue arrow above), close the Examity browser tab (by clicking on a little cross with thin blue arrow below), and you will return to the “Castle Registration” browser tab (thick blue arrow below).
If any aspect of your computer is found to be unacceptable for testing, you will need to find another work station or computer for the testing purposes.
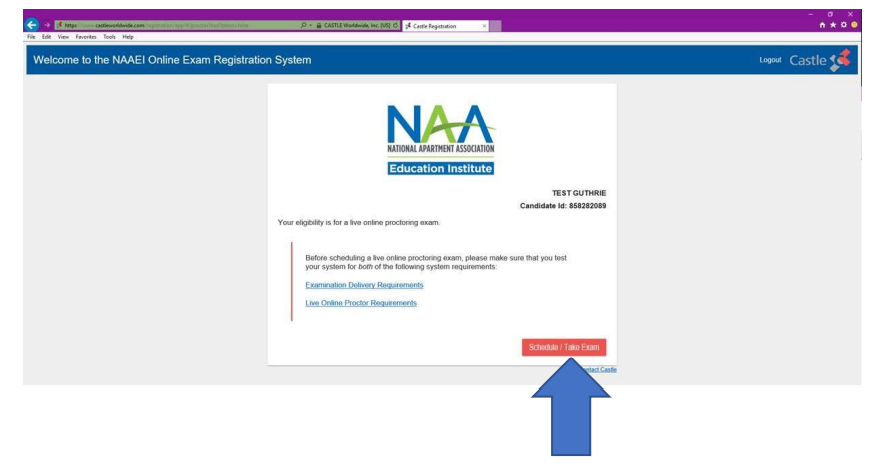
- After you’ve tested both system requirements, you can now click on the red button “Schedule/Take a live online proctoring exam.”
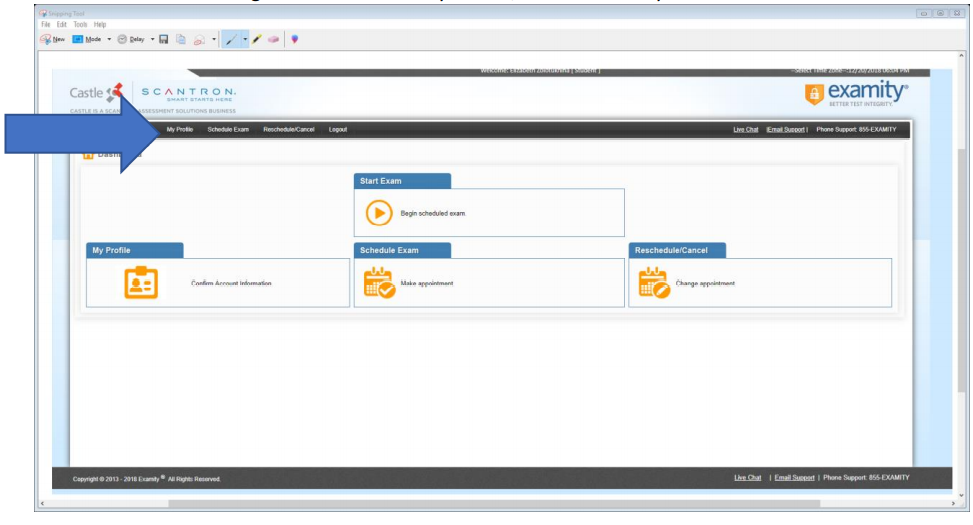
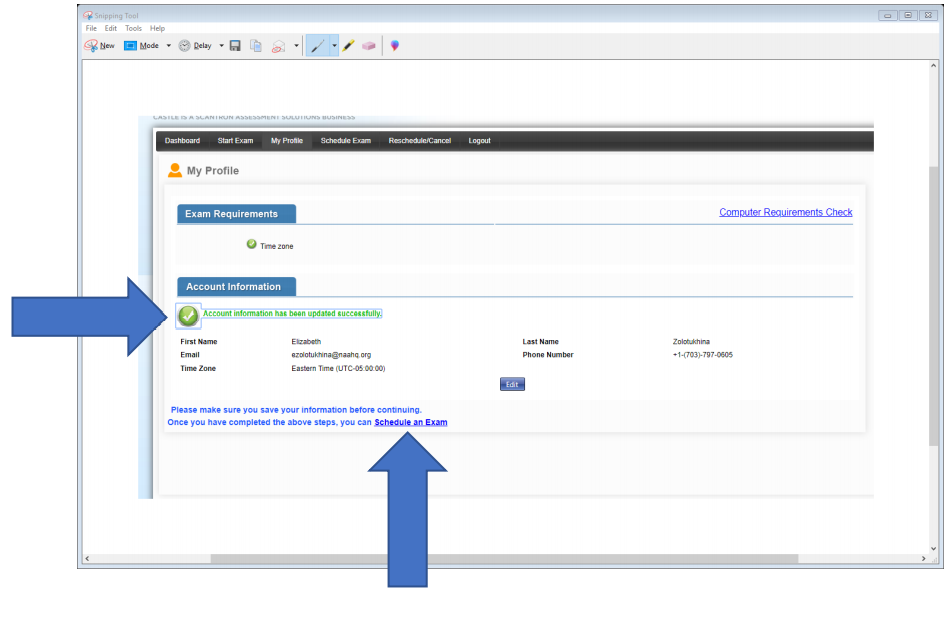
- You will see the following screen. Click on “My Profile,” as indicated by the thick blue arrow.
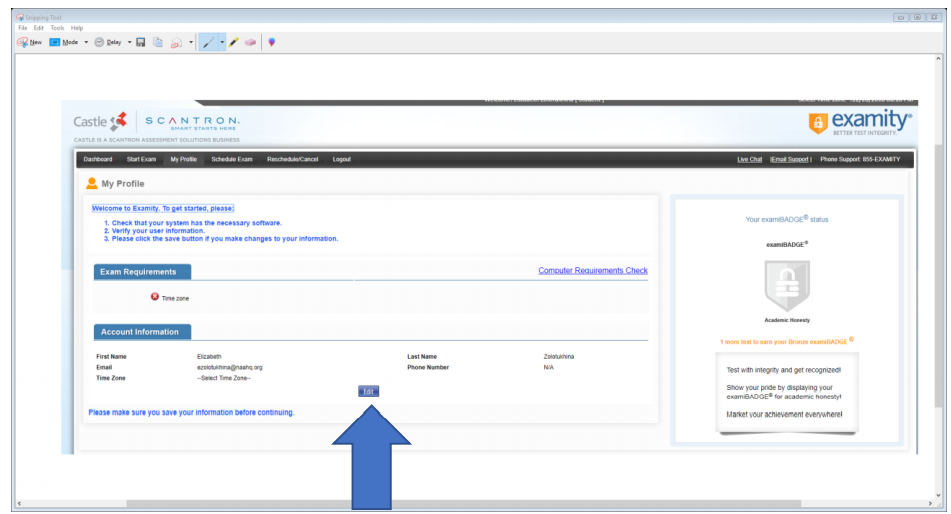
- On the next screen click on “Edit”. This will allow you to review and confirm the details on your account.
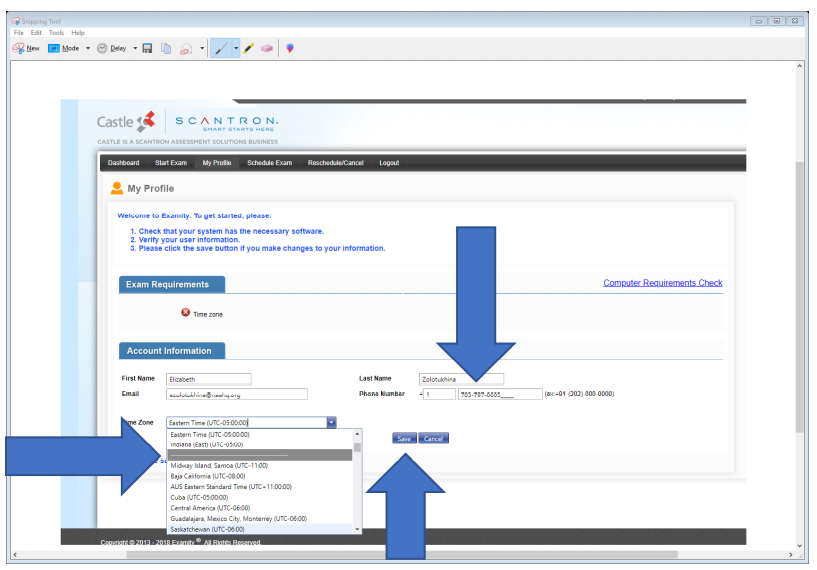
- In the “Account Information” section, enter your phone number and select your time zone from the drop down list, as shown below. This is very important for your exam scheduling. Click “Save”.
- You will see the message “Account information has been updated successfully.” Now click on “Schedule an Exam” at the bottom of the screen.
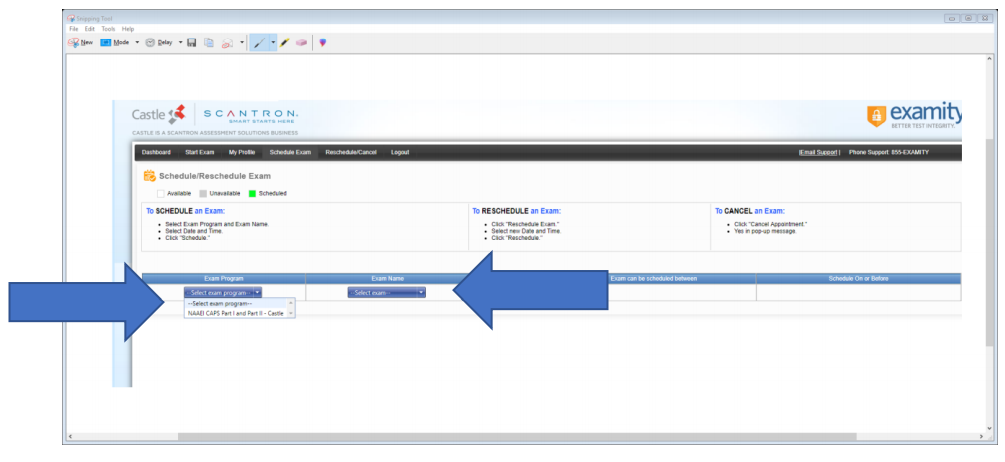
- From the “Exam Program” drop down list, select the exam you’d like to schedule. From the “Exam name” drop down list, select the exam name.
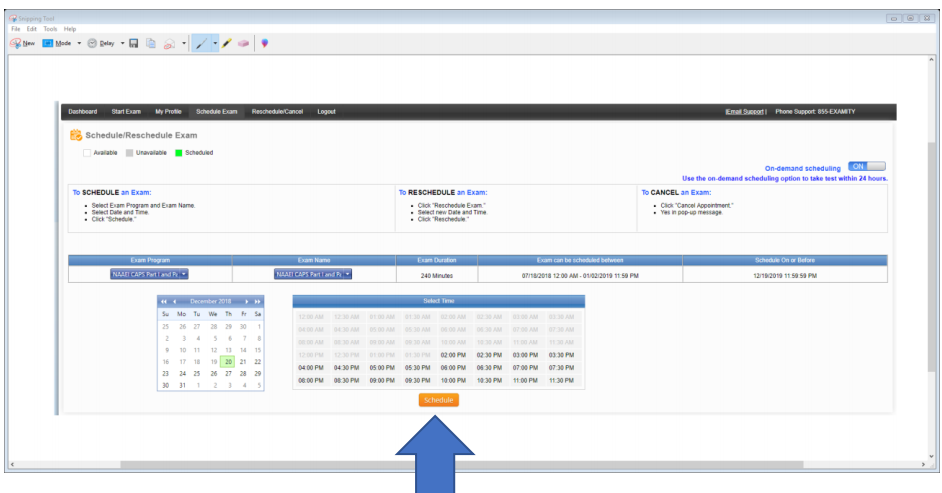
- If you would like to take your exam within the next 24 hours, be sure that the On-demand Scheduling button is switched to “On”.
- If On-demand Scheduling is switched to “Off” you will NOT be able to schedule within the next 24 hours. You must switch On-demand Scheduling to “Off” in order to schedule beyond the next 24 hours.
- From the calendar showing available dates, select the one that suits you. Once you click on a date, all available appointments will be shown on the right. Pick the one you like, and Click “Schedule”.
- You will see a pop-up asking to confirm the selected schedule. Click “Yes” if you are sure you are available to take the test on this date and time.
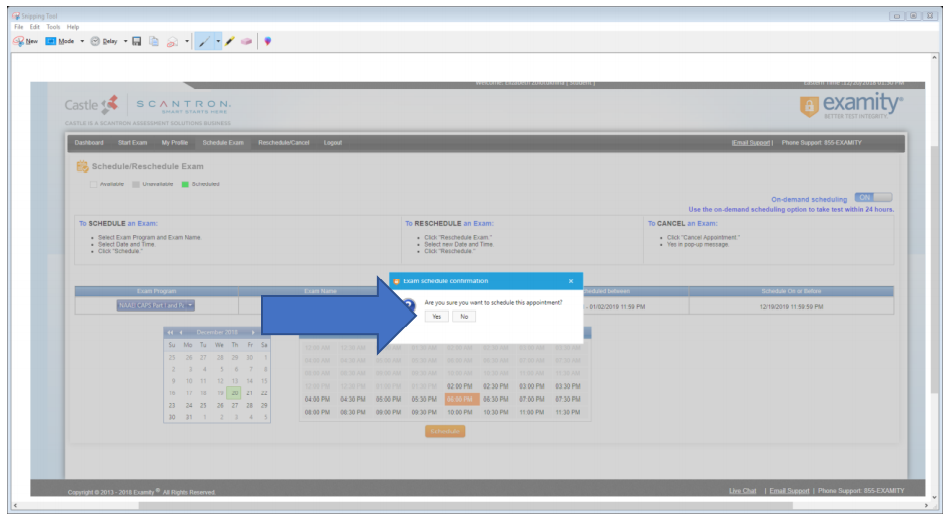
- You will see “Appointment scheduled successfully.”

- Your exam is now scheduled. Following the scheduling, you should receive an email with the subject line “Castle Worldwide: Your Exam Appointment” from [email protected] “. This email contains your exam appointment ID and the link to begin your exam. Please be sure to have this email readily available right before your test. Refer to this email and the instructions for taking your LOP exam when you are ready to do so.