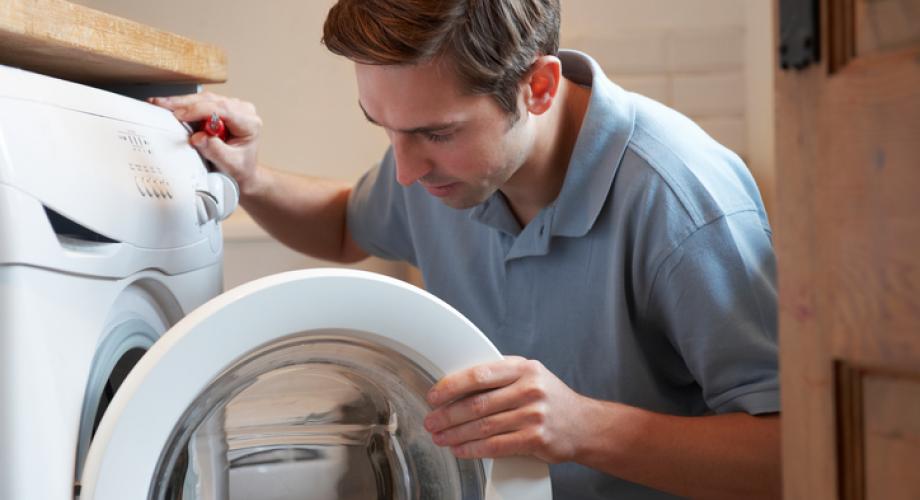
Q: My apartment building has washer and dryer hookups in each unit. A resident installed a new front-loading washing machine in one apartment and now the pipes bang. This did not happen with our regular top-loading machines. The noise is annoying and potentially dangerous. I’m afraid this might cause a waterline break. I don’t want to tear into the walls. How can I remedy the banging issue?
The hammering sound is caused by the rapid opening and closing of the water valve. Water starting and stopping rapidly can cause the pipes to move. Most washing machines and dishwashers use a fast-acting solenoid to control the water valve. Today’s front-loading washing machines use a solenoid to control their water valves, but they open and close many times during the cleaning cycle, so the hammering is more noticeable and damaging.
The simplest and least-expensive remedy is installing a Mini-Rester laundry hammer arrester. Mini-Resters are installed either at the washing machine’s hot and cold valves, or directly to the back of the machine’s inlet nipples. The job takes no longer than the time needed to unscrew the hose from the hose bib or machine and reinstalling the hose back onto the machine or hose bib, with the Mini Rester placed in between. These hammer arresters are available at most hardware stores for about $20 apiece. One is needed for the hot-water side and the cold-water side. The “Mini Rester” is designed as a single-fixture remedy. If the problem continues, a larger water hammer arrester is needed.
Q: I plan to install a new sprinkler system in the lawn area of my apartment building. How do I estimate the number of heads needed and how far apart they should rest?
First, accurately measure the area where the sprinkler system will be installed. Transfer those measurements onto graph paper. Decide on a scale, such as one square of the graph paper equals one square foot. If the area is much larger, perhaps use one square to equal five or 10 feet. Draw the dimensions of the area you are planning to irrigate.
Next, decide what type of sprinkler head will be used, such as impact sprinkler (Rainbird type), brass heads or pop-up or rotary heads such as those that Toro offers. Manufacturers’ list the water spray radius. If you want the diameter the head will cover, multiply by two. But, knowing the radius should be enough for this exercise.
The spray coverage should overlap each head between 80 percent and 100 percent. What this means is: If the sprinkler head has a spray radius of 10 feet, each sprinkler head should be spaced 10 feet apart. That is called head-to-head spacing. If you deviate greater than 80 percent, you may create dry spots during the times when the water is needed most, such as during summer heat and windy conditions. Stated another way, sprinkler “A” should wet sprinkler “B” and so on.
On the graph paper grid, the circles should intersect and touch each sprinkler head. Don’t forget: The more sprinkler heads you have, the more you will need to pay attention to both gallons per minute (GPM) and the water pressure that supplies your sprinkler system. Sprinkler manufacturers should have a chart showing how many sprinkler heads can be controlled by one valve based on the GPM at a certain water pressure.